For all those, who’re running a small or medium-sized business, Intuit’s QuickBooks software is, without a doubt, considered as the most popular and widely used accounting software. This well-known, comprehensive, and effective software is among the top choices of business owners as the software caters to their needs for managing as well as hosting almost every financial and accounting tasks of an organization.
QuickBooks Software would be the first solution to come to the minds of many for managing tasks like invoicing customers and tracking income and sales of an organization with the most ease and in a most secure manner. However, to be your surprise, that’s not all about QuickBooks as Intuit also provides payment solutions for individuals and small businesses. In fact, the point of sale solution in the form of “QuickBooks POS” has been considered as one of the best available ‘Point of Sale‘ software options in the market.
Integrated with QuickBooks software, QuickBooks POS is a potent platform that offers small businesses and franchisees the opportunity to enjoy its comprehensive features like processing multiple payments, inventory management, employee management, sales optimization, customer management, as well as automated banking process, etc.
To be short and precise, QuickBooks Point of Sale allows users to configure price tags & receipts, track layaways (purchasing method), set promotional prices, multi-user access for client workstations, manage rewards programs, and also ship packages with the help of its Shipping Manager module. And, all thanks to its user-friendly interface, it simplifies these basic daily tasks.
Being available in ‘Basic and Pro’ versions, “QuickBooks POS” is planned and produced by Intuit to attract mainly two types of users i.e., one who want to set up their own business and the other who want to set up a new system for the existing outlet; by offering on-premise, online-based and mobile point-of-sale solutions.
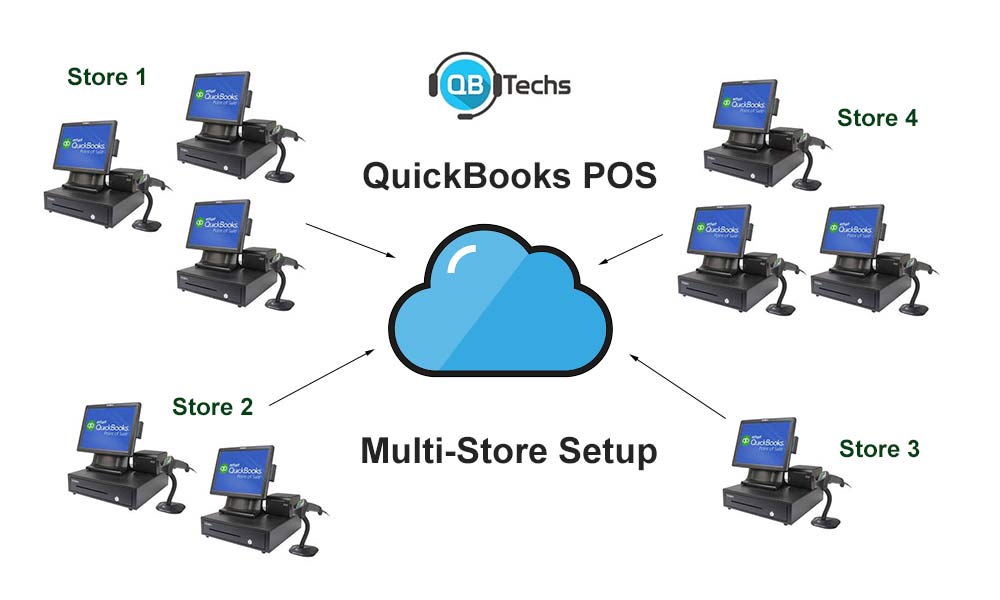
So, if you’re one of these two types of users, you need to set up ‘Multi-user for QuickBooks Point of Sale’ in order to view your business at a glance with sales, inventory, and customer data at your fingertips.
However, the setup process of QuickBooks POS is not as easy as it looks like; in fact, you need proper technical support and guidance for the same. Therefore, having this in mind, below we’ve mentioned the step-by-step guide about how you can set up QuickBooks Point of Sale for Multiple Stores in the most effective manner. So, keep reading further to get yourself assisted for the same:
How to Set up QuickBooks Point of Sale for Multiple Stores
Before starting with the steps to set up QuickBooks Point of Sale on your desktop, you need to download and install it on your operating system. And, only then you’ll be able to perform the steps further outlined in this blog. So, download the QuickBooks POS from its Intuit’s official site and after that follow these given steps:
Step 1: Folder Permissions:
- First and foremost, click right on the folder from the location where your POS Company file is saved in order to select its ‘Properties.’
- From there, click on the ‘Sharing’ tab and then go to the ‘Advanced Sharing’ tab to further select the ‘Share this folder’ option.
- Then, choose ‘Permissions’ and click on ‘Add’ option.
- In order to add, type in ‘QBPOSdbsrvuser’ and click on the ‘OK’ button in order to choose the newly added ‘QBPOSdbsrvuser’ to select ‘Full Control’ from its options.
- That’s it! Click on the ‘Apply’ and ‘OK’ button.
Step 2: Configure Windows Firewall
- Press and hold the ‘Windows key’ from your keyboard to open the ‘Start Menu.’
- In the Start menu’s ‘Search bar’ type ‘Firewall’ and click on ‘Enter’ to open the Windows Firewall Window.
- Then, from the right-hand side of the Windows Firewall, select the ‘Advanced Settings.’
- From there, click right on the ‘Inbound Rules’ in order to select the ‘New rule’ from the ‘Actions’ tab at the left.
- Then, choose the ‘Port’ option and click on ‘Next’ to reach the protocol and ports tab.
- There, in the ‘Specific local ports’ allow the ports “8040, 8443, 8036, 8025, 8024, 46228, 46225, 46216-46220, 46203, 2638, 443.”
- After typing these ports, click on ‘Next’ and select ‘Allow the connection’ in order to further select the ‘Next’ button.
- Now, ensure that all the profiles are ‘Checked-marked’ and once done with it, click on ‘Next.’
- Then, in order to finish the configuration of the Windows Firewall, give a name to the rule as ‘QuickBooksPorts.’
- That’s it! Click on ‘Finish’ and just repeat the same steps for the ‘Outbound Rules’ till the 3rd point and then instead of ‘Inbound’ select ‘Outbound’ as the option which will allow the ports as “8036, 8035, 8024, 2638.”
Step 3: Switch the Server to Multi-User Mode
- To do so, simply go to the ‘File’ menu, and from there select the ‘Company File’ in the Multi-User Mode.
- That’s it! Change the ‘Store Type’ to Point of Sale Pro Multi-Store.
That’s all about the process of setting up the QuickBooks Point of Sale for Multiple Stores.


Leave A Comment
You must be logged in to post a comment.