QuickBooks is a well know accounting and bookkeeping software used by over 10 million small business owners in the USA. Intuit, the manufacturer of QuickBooks constantly adds new features and updates to the software to improve its overall productivity. QuickBooks users are always advised to use the latest software version and update it regularly.
Sometimes software programs can be hard to manage and can show strange behavior. Like every other software, QuickBooks is software and can show errors sometimes. In such cases, there is no need to panic. By following simple troubleshooting instructions one can overcome these errors and use QuickBooks to its full potential. QuickBooks error 1603 is an installation error that can be seen while installing QuickBooks desktop on a computer.
What is QuickBooks Error 1603?
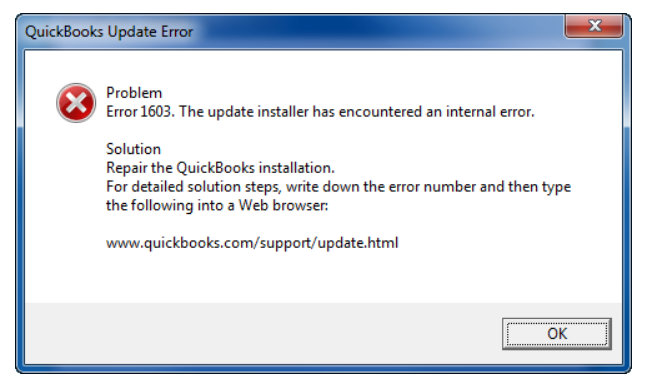
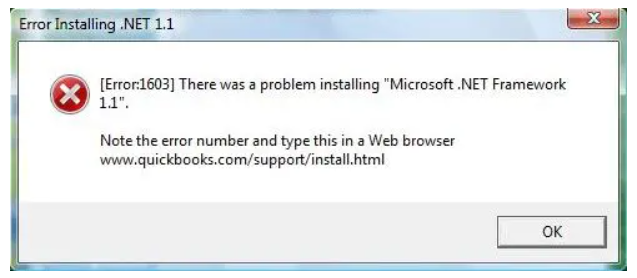
QuickBooks error 1603 is seen while installing QuickBooks for the first time mostly. It is one of the QuickBooks Installation errors which is caused due to damaged Windows components or one or more processes running in the background during QuickBooks installation. This error code can pop up in between the QuickBooks installation due to damaged or outdated Windows components such as .NET framework, C++, or Microsoft MSXML. It can also cause other related errors such as QuickBooks error 1603, QuickBooks error 1903, QuickBooks error 1722, and QuickBooks error 1935 while installing QuickBooks. The QuickBooks installer can also disappear during the installation process without any reason. If this error occurs during installation, a pop-up window will appear with either of the following messages.
Error Status 1603: The update installer has encountered an internal error.
Error Status 1603: Unable to apply the patch.
MSI returned 1603: Fatal error during installation.
A window with the following error message will display on your screen
“Install Error 1603: There was a problem installing Microsoft .NET Framework.”
Or
“Install Error 1642: Error installing Microsoft .NET Framework while installing QuickBooks.”
Causes of QuickBooks Error Code 1603?
- Infected or Corrupt installer file
- An incompletely downloaded Microsoft installer file
- A recent power surge or power failure
- A faulty hard drive
- Your system might be infected with a virus or a malware
- Windows security policies can also prevent it from installing especially when installing on Windows servers
- Missing, damaged, or outdated Windows components such as .NET framework, C++, or Microsoft MSXML
- Using an unsupported or outdated Windows version.
Solution 1: Install Tool Hub to Run Install Diagnostic Tool
Step 1: Download and Install the QuickBooks Tool Hub
The QuickBooks tool hub is a useful program to fix many problems in QuickBooks desktop. Follow the steps below to download and install it.
- Close QuickBooks
- Download the latest version (1.6.0.3) of the QuickBooks tool hub.
- Go to your downloads folder and open the file that you downloaded (QuickBooksToolHub.exe).
- Complete the directions provided during the installation process.
- Once the installation is complete, double-click on the tool hub icon to open it.
Step 2: Use the QuickBooks Install Diagnostic Tool
- Start the QuickBooks Tool Hub.
- Go to Installation Issues.
- Click on QuickBooks Install Diagnostic Tool. Let the tool analyze the installation. It can take up to 20 minutes.
- Once the tool completes analyzing, restart your computer.
Solution 2: Update Windows
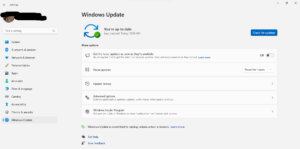
Update Windows 11
- Press the Windows key on your keyboard
- Go to Settings >> Windows Update
- Click on Check for Updates
This page will also show you your Windows update history and newly available updates that are needed to be installed.
Update Windows 10, 8.1 or 8
- Press the Windows key on your keyboard
- Go to Settings >> Windows Update & Security
- Click on Check for Updates
Update Windows 7
- Click on the Start button
- Go to Control Panel >> System & Security >> Windows Updates
- Click on Check for Updates
Solution 3: Manually Repair Windows Components
Repair Microsoft MSXML
Damaged MSXML can cause a number of issues in QuickBooks desktop. It is important to repair damaged MSXML manually if it is not resolved by using the QuickBooks tool hub.
In a 64-Bit operating system, register MSXML with the following steps
- Run cmd as Administrator
- At the C: prompt, enter cd\windows\syswow64.
- Type regsvr32 MSXML6.dll and press Enter.
In a 32-Bit operating system, register MSXML with the following commands
- Run cmd as Administrator
- Type in cmd, then press Enter.
- Type regsvr32 MSXML6.dll, then press Enter.
Manually fix Microsoft .NET Framework
Method 1:
- Go to Control Panel and open Programs and Features
- Click on Windows Features
- Now find the version of .NET.and double click on it
- Check the .Net Framework 3.5.1 & 4.5 options if not already checked
- Click on Uninstall a Program
- A window will pop up and ask do you want to Repair or Remove the program.
- Click on Repair and then Restart the computer
- Check the .Net Framework 3.5.1 & 4.5 options again
- Restart your computer system.
Method 2:
For Windows 10 and newer versions
- Close all open programs.
- Open the Windows Start menu.
- Type “Control Panel” into the search and open Control Panel.
- Go to Programs and Features.
- Select Uninstall a Program.
- Select Turn Windows features on or off.
- Find .NET Framework on the list.
Check the settings for both .NET Framework 4.5 (or later) and .NET Framework 3.5 SP1.
Check NET Framework 4.5 (or later)
If the .NET Framework 4.5 (or later) checkbox isn’t checked:
- Select the checkbox to turn on .NET Framework 4.5 (or later).
- Select OK to save your changes.
- Restart your computer.
If the .NET Framework 4.5 (or later) checkbox is already checked:
- Select the checkbox to turn off .NET Framework 4.5 (or later). Don’t turn it back on.
- Select OK to save your changes.
- Restart your computer.
- When you’re signed in back into Windows, follow the steps to turn on .NET Framework 4.5 again.
Check NET Framework 3.5 SP1
If the .NET Framework 3.5 SP1 checkbox isn’t checked:
- Select the checkbox to turn on .NET Framework 3.5 SP1.
- Select OK to save your changes.
- Restart your computer.
If the .NET Framework 3.5 SP1 checkbox is already checked:
- Select the checkbox to turn off .NET Framework 3.5 SP1. Don’t turn it back on.
- Select OK to save your changes.
- Restart your computer.
- When you’re signed in back into Windows, follow the steps to turn .NET Framework 3.5 SP1 on again.
Solution 4: Install QuickBooks in Selective Startup
Your anti-virus program, antispyware, or third-party apps might be blocking QuickBooks from installing.
If you are unable to install QuickBooks, you can try installing it in Selective Startup.
Step 1: Turn on Selective Startup
- Press Windows+R on your keyboard to open the Run command.
- Enter msconfig, then select OK.
- In the General tab, select Selective startup and Load system services.
- Go to the Services tab, then select Hide all Microsoft Services.
- Select Disable all.
- Uncheck Hide all Microsoft services.
- Select Windows Installer from the list of services.
- Select OK.
- On the System Configuration window, select Restart.
Step 2: Install QuickBooks Desktop
- Install QuickBooks Desktop
- Press Windows+R on your keyboard to open the Run command.
- Type msconfig, then select OK.
- In the General tab, select Normal startup.
- Select OK.
- On the System Configuration window, select Restart.


Leave A Comment
You must be logged in to post a comment.