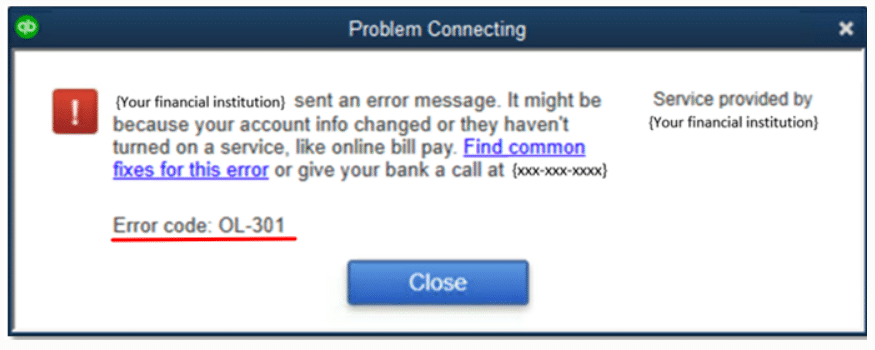
Error OL 301 shows up on your screen when there is a connection problem between your bank and QuickBooks or when there is a problem with the Company File. The error window will usually have the header, ‘Problem Connecting’, along with a long body explaining the error and the error code at the end of the error message.
Causes of QuickBooks Error OL 301
QuickBooks Error OL 301 usually comes up when there is a problem with the connection between your QuickBooks program and your financial institutions. Reasons, why this may happen, are:
- The financial institutions’ online platform may be under maintenance
- Your bank’s servers may be down
- QuickBooks may need an update
- Your company file may have data integrity problems.
Things To Do Before Fixing QuickBooks Error OL 301
Begin by backing up your company file in order to minimize the risks of data loss. Once the company file is backed up, we will find out whether the problem lies with the company file or the bank connection. To do this, we will create a test company file and see if we get the same error.
Steps To Backup Your Company File
- Open QuickBooks Desktop
- Click on ‘File’ then click on ‘Backup Company’
- Then choose ‘Create’
Steps To Create a Test Company File
- Open QuickBooks desktop and ‘File’.
- Choose ‘New Company’
- Click on ‘Express Start’ or ‘Start Setup’
- Enter the required details in the Startup window and click on ‘Create Company’
- Choose the option ‘Start working’ and check if you get the error message again
Solutions:
Follow these solutions step by step to resolve this error:
If The Error Message Shows Back
It means that there is a problem with the connection between your bank and QuickBooks.
A common reason why this happens is when you have recently installed QuickBooks, and your bank requires you to confirm your identity before you begin using the bank’s online services through QuickBooks. If this is the case, then login to your bank through the browser and check if there are any notifications that require you to approve access to your bank’s online services from QuickBooks. If you don’t see any notifications and your bank’s online services can be accessed without problems when you log in through the browser, then call your bank for help with access through QuickBooks.
Make sure you discuss the problem with a representative who knows about QuickBooks Online Banking.
If You Do Not See The Error Message
It means that the problem is not with the bank connection but with the QuickBooks software or the company file. The following solutions can help in solving QuickBooks Error OL 301 when the problem is with QuickBooks and not the bank.
Reset the Bank Connection
Sometimes, when banks update their online service systems, it is possible that the connection between QuickBooks and the bank would have been interrupted, causing the error. To solve this, we can refresh the bank feeds for the bank with which you are having problems.
- Make sure all downloaded transactions have either been matched or deleted for the account. You will not be able to switch off the bank feeds if there are pending transactions.
- Click on ‘Lists’ and choose ‘Chart of Accounts’
- Right-click on the bank account with which you are having troubles and choose ‘Edit Account’
- Now go to the ‘Bank Settings’ tab
- Then you have to select ‘Deactivate all online services’
- Confirm your selection by click on ‘OK’
- Then click on ‘Save & Close’
This would have disconnected the bank feeds for the bank. Now we must follow the steps to reconnect the bank feeds.
- Close QuickBooks and reopen it
- Go to ‘Banking’ and select ‘Bank feeds’
- Choose the option ‘Set up Bank Feeds for an account’
- Now choose your bank in the field that says ‘Enter your bank’s name’
- Click on ‘Continue’
- Enter your bank credentials to log in to your bank account and click on ‘Connect’
- Select the bank account that you want to connect
- Click on ‘Finish’
Now your bank feeds have been refreshed, and you can try to download transactions from your bank and use QuickBooks to check for errors.
Reset All Banking Connections
If you still get the same error message, then follow the steps to refresh bank feeds for all bank accounts connected with your QuickBooks Desktop. Make sure you include inactive accounts as well.
- Click on ‘Lists’ and from the menu, choose ‘Chart of Accounts’
- Click on ‘Include Inactive’
- This will show you a list of all bank accounts connected with QuickBooks
- Use the steps above to reset your bank connection for all bank accounts
Identify and Resolve Problems in the Company Data
If the error message shows up again, run verify and rebuild utilities to resolve problems with the company data, which may be affecting the bank connection.
- Click on ‘File’ and go to ‘Utilities’
- Choose ‘Verify Data’
- Click on ‘OK’ to close all open windows and allow QuickBooks to detect problems. If no problems are detected
- If problems are detected with the data then proceed to the next step of using the ‘Rebuild Tool’
- Click on ‘File’ and go to ‘Utilities’
- Select ‘Rebuild Data’
- Then click on ‘OK’ and choose ‘Save’ to create a backup
- After the rebuild tool has rebuilt data click on ‘View Results’ and it will show you if there are any issues or not.
- Run the rebuild tool a second time to fix existing issues.
- After running the rebuild tool twice, if you keep getting the same error message, then speak to a professional QuickBooks troubleshooting expert to solve the problem.


Leave A Comment
You must be logged in to post a comment.